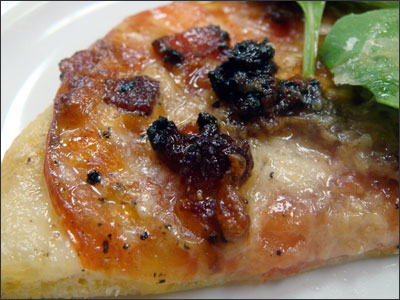
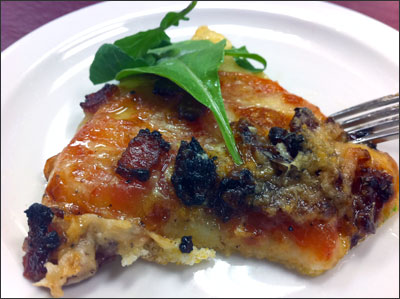
Green Grape Heirloom and Avocado Gazpacho

I’m finally at the end of the Tomato Summer Tour 2010. The last recipe of the evening was Green Grape Heirloom Tomato and Avocado Gazpacho.
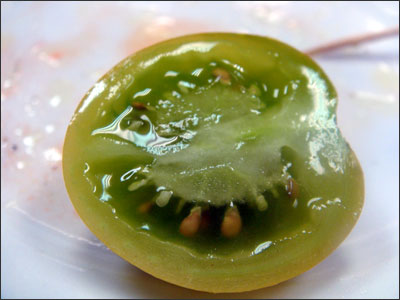
I know lots of bloggers eat and make gazpacho on a regular basis, so I was excited to see what this option would taste like. I’ve ordered gazpacho in restaurants, just never made it myself. Now I’m kicking myself – it’s so dang easy to make and perfect for a hot weather/summer meal.

The Ingredients:
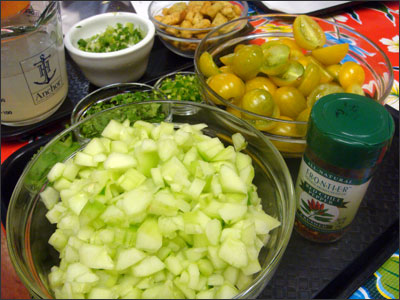
25-30 Green Grape Heirloom Tomatoes
2 Cucumbers  – peeled, seeded, and diced
2 Limes – juiced
1/2- 1 Cup Chicken or Veggie Stock – Chef Terese used Chicken – I’d use veggie to make it vegetarian.
1/2 Cup Fresh Cilantro Leaves
1 Small Jalapeño
2 Green Onions – sliced, including green tops
2 Ripe Avocados – add extra virgin olive oil if the avocados aren’t ripe enough – it makes them creamier.
Salt and Pepper to taste – 1/2 a teaspoon at least
Croutons, Cilantro and Extra Virgin Olive Oil for garnish

Directions:
In a blender, puree cucumbers, tomatoes, lime juice, 1/2 cup broth, 1/2 cup cilantro leaves, jalapeño, green onions, and 1 of the avocados, diced. Season to taste, with salt and pepper. Cover and refrigerate for about 2 hours or until the next day.

To serve, thin gazpacho with additional broth if desired. Dice remaining avocado finely and add to gazpacho base. Pour into bowls and garnish with cilantro leaves and croutons and top with a swirl of extra virgin olive oil.
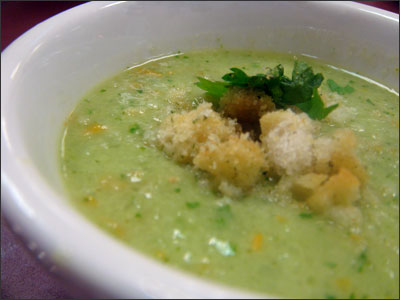
I really liked it. Kristen, my cooking class partner in crime, would have rather had tortilla chips to dip into it.  She isn’t a fan of cold soups in general, but in her defense, it did taste a little like salsa verde. It was pretty acidic and everyone at the table stopped eating after 3-4 spoonfuls.

I’ve seen green, white, red – smooth, thick and chunky gazpacho soups. Some recipes use bell peppers, onion, lemon, and other fruits. I guess it’s like other soup recipes, lots and lots of variations.

Do you have a favorite gazpacho recipe to share?

Permanent link to this article: http://foodiddy.com/?p=973

Strozzapreti w/Brie and Tomatoes

Strozzapreti (Priest choker in Italian) is an elongated, hand rolled pasta. One of the legends created to explain the origin of the “Priest choker” name goes back to the tradition of women from Romagna (south-eastern portion of present-day Emilia-Romagna) preparing this type of hand rolled pasta for the local priests, while the husbands, evidently opposed to the influence of the church/clergy in political affairs, wished that the  priests would choke while  stuffing themselves with the pasta.

I had never seen the pasta before. Chef Terese used Montebello Organic Strozzapreti, but any tubular pasta would be fine. Penne or Fusilli would work great for the Strozzapreti with Brie, Tomatoes and Basil recipe.

The Ingredients:
1 lb. Good Quality Pasta – Any tube shape will work
3 Tablespoons Extra Virgin Olive Oil
2 Small Garlic Cloves – put through a press
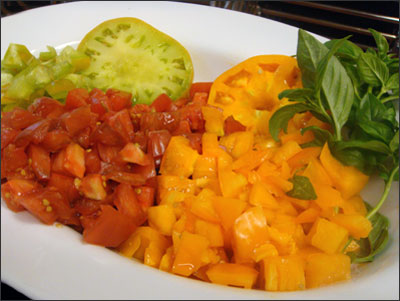
2 Cups of Assorted Color Heirloom Tomatoes – Chef Terese used Purple Calabash, Aunt Ruby’s German Green and Persimmon
8 ounces Brie cheese – cut into small chunks  – Chef Terese used the good/expensive stuff – if you aren’t used to buying the good stuff, it has a more robust flavor. You could substitute with a mild Brie or use goat cheese instead.
A handful of fresh basil leaves
Parmesan Cheese  – sprinkled on top
Sea Salt and Ground Black Pepper to taste

Directions:
Bring 4-5 quarts of salted water to a boil. Drop in the pasta and cooked to desired doneness and drain. Do not rinse your pasta people!

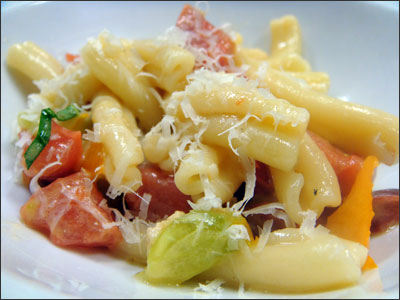
Place the hot pasta into a large bowl. Toss the cubes of Brie into the pasta first and mix. Then add the tomatoes, basil, olive oil and garlic. Season with salt and pepper. You may need more olive oil, totally up to you. Add some Parmesan to the bowl before serving.

This dish can be served multiple ways. Hot, cold or at room temperature – it really doesn’t matter. Chef Teresa suggested it as a great potluck dish. I have to say, it was not one of my favorites of the evening, but I did enjoy it. I obviously buy cheap Brie – because it’s more mellow than what she used. The Brie she used was more than $20 and had a very distinct “stink” – hah! I’m definitely going to give this dish a try with a more mellow Brie or I’ll try the goat cheese. Most people at the table felt the same way. Sometimes fancy isn’t the way to go if your palate isn’t used to it.

All that aside, I was excited to learn the origin of a new pasta (to me), and I think I can use this recipe as a base to create many others.

Permanent link to this article: http://foodiddy.com/?p=951

Pizzettas with Heirloom Tomatoes

I am definitely a pizza girl. If I had limited food choices to eat for the rest of my life, cheese pizza would top the list. I’m not much of a meat on my pizza girl – occasionally, but I prefer plain cheese. If I add toppings, it’s usually tomatoes, spinach, caramelized onions, mushrooms,  (Round Table paper-thin is my favorite) or olives. I do sometimes eat Hawaiian pizza or Round Table – pepperoni, mushroom and olive – but it’s a rare thing.

Thin crust vs. thick crust? – I prefer thin crusted pizza, but I do love a great Chicago style thick crust – just not when ordering plain cheese. Needs to be loaded with toppings.

Well, now that you are “all up in my pizza” dos and don’ts – let me share an amazing Corn Meal Pizza Dough and Pizzettas with Heirloom Tomato recipe with you.

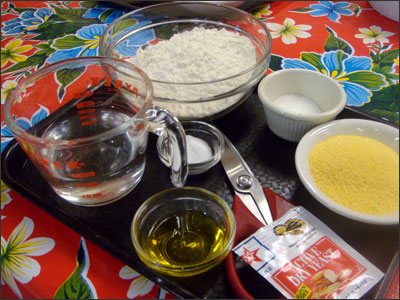
Dough Ingredients:

1 Package Active Dry Yeast
Pinch of Sugar
3/4 Cups Warm Water (100 degrees F)
2 Cups All Purpose Flour
1/3 Cup Corn Meal
1 1/2 Teaspoons Sea Salt
2 Tablespoons Extra Virgin Olive Oil

Recipe makes two 8-10 inch pizzas or 6 pizzettas – depending on size

Directions:

In a mixing bowl combine the yeast, water and sugar and mix well. Let sit for 5 minutes or until mixture begins to bubble.

Add in remaining ingredients and knead to a rough ball. Knead by hand for 12-15 minutes or in a mixer for 8-10 minutes. Dough should be smooth and elastic (pressing an indentation into the dough should spring back).

Transfer dough to an oiled bowl and cover with plastic. Place in a warm area and let dough double in size (about 1 hour). Punch dough down and portion into desired number of pieces. Let dough rest 5 minutes before rolling out.

Pizzetta Ingredients:

1/2 Recipe of dough
8 ounces fresh mozzarella, sliced
3 Heirloom Tomatoes – Sliced and drained on paper towels. Chef Terese used Black Brandy Wine
4 ounces cooked bacon* – chopped into a 1/2 inch dice
2-4 ounces parmigiano reggiano
2 ounces arugula – washed and spun dry
Sea salt and Pepper to taste
Drizzle with decent extra virgin olive oil – Chef Terese used Apollo

* Let’s talk bacon – Chef Terese used a Keller Premium-Artisan Applewood Bacon – $10/lb. and WOW was it awesome! The smoky flavored “yum factor” would be worth paying the extra money for. Don’t you like how I’ve now ramped up my game in the world of oils, cheese and bacon? Yes, I’m going to be eating Top Ramen for the non blog posting days, just so I can pay for more premium ingredients.

Pizzetta Directions – Part II:

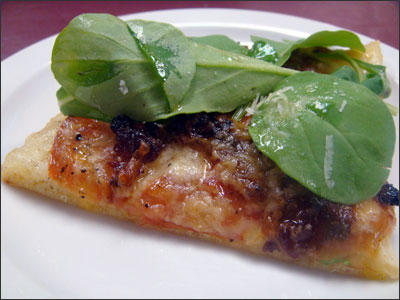
Roll out dough to desired size. Transfer to an oiled pizza pan or onto a pizza peel dusted with flour or semolina. Place the toppings on the pizzetta starting with some cheese, then tomatoes, then bacon. Top with a little parmigiano. If using a pizza stone, preheat stone in oven and use a pizza peel to slide pizzetta on and off the stone.

Bake pizzettas in preheated 425 degree oven for 10-14 minutes or until crust is golden brown, crispy and cheese is bubbly.

Remove from oven, top with arugula and cool for a few minutes before slicing.

Bacon…

Yum…

If you have leftover dough, you can store it in the freezer in an oiled Ziploc bag. Defrost overnight in the fridge in a covered bowl. Let rest for at least 1 hour at room temperature before working with it.

Permanent link to this article: http://foodiddy.com/?p=935