
We tend to go out every Friday night with friends. We decided this year we would make more of an effort to eat some meals at home like we used to – making recipes as a group and trading off hosting/houses. I received a text from my girlfriend Michelle with a link to Half Baked Harvest’s – Simple Coconut Quinoa and Lentil Curry with Lime Mango asking what I thought about trying to make it on a Saturday, since it was a little too involved for Friday after work. It sounded good to me, but I knew it was going to be a VERY hard sell to Dan. I knew for sure the Greek yogurt would be a “no go” and team that with the kale, quinoa and lentil “way too healthy” trifecta and I pictured stopping at McDonald’s on the way there. I was wrong. I showed him the recipe and he agreed to give it a try… so off to the store Michelle went.
The dish was very ingredient heavy, but it was worth it for sure. If you want to see gorgeous food photography, head over to the linked recipe post. I’ve got iPhone photos here because I wasn’t even sure I was going to post about this. The photos I took were just for my own reference…then I tasted the dish and wanted to share with everyone on planet Earth. Ha-ha.
Michelle and I did make some substitutions to the original recipe and those are noted below
M&K’s Coconut Quinoa and Lentil Curry
Ingredients:
- 2 tablespoons coconut oil
- 2 red bell peppers chopped – we diced
- 2-3 carrots chopped – we diced 3
- 2 cloves garlic minced or grated – we minced 4 instead of the 2 suggested
- 1/4 teaspoon ground ginger – recipe called for 1 tablespoon fresh – our piece of ginger was bad… so we switched to ground
- 2-3 tablespoons Thai red curry paste – we used 2
- 1 tablespoon curry powder – you could use spicy curry powder for more heat
- 1 (14 ounce) can full fat coconut milk
- 4 cups coconut water OR vegetable broth OR water – we only used coconut water
- 1 tablespoon fish sauce or soy sauce if you want to make it veggie – we used soy sauce
- 1 cup green lentils rinsed
- 1 cup mixed red and white quinoa rinsed
- 3-4 big handfuls baby kale – we used massaged regular rough chopped kale, stems removed
- Juice + zest from 1/2 a lemon – we used the whole lemon
- 1/4 cup fresh cilantro + basil chopped – we used fresh cilantro, but dry basil – 1 teaspoon dry is equal to 1 tablespoon fresh. We used 4 teaspoons
- 1 mango sliced or chopped – we chopped
- 1 lime zest + juice
- Salt to taste – we added it after our pre-service tasting
- Naan, greek yogurt, fresno chiles + almonds, for topping – we left off the fresno chilis and almonds because we forgot to get them – the almonds would probably be good texturally, but it certainly didn’t need them.
Instructions:
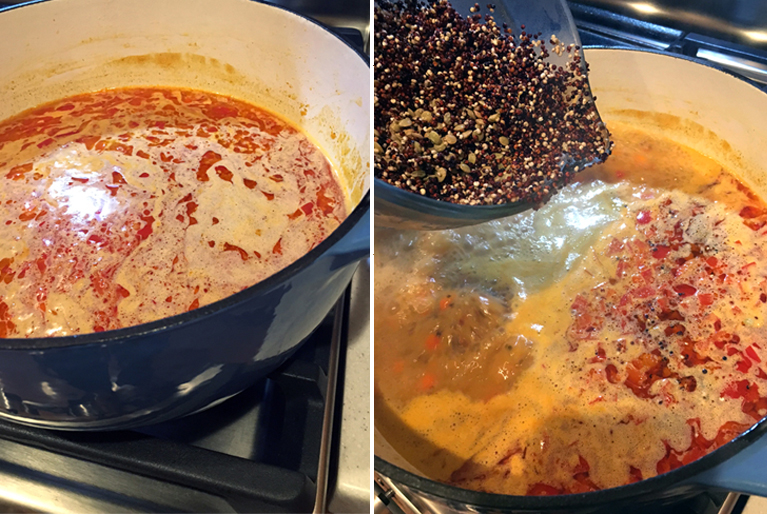
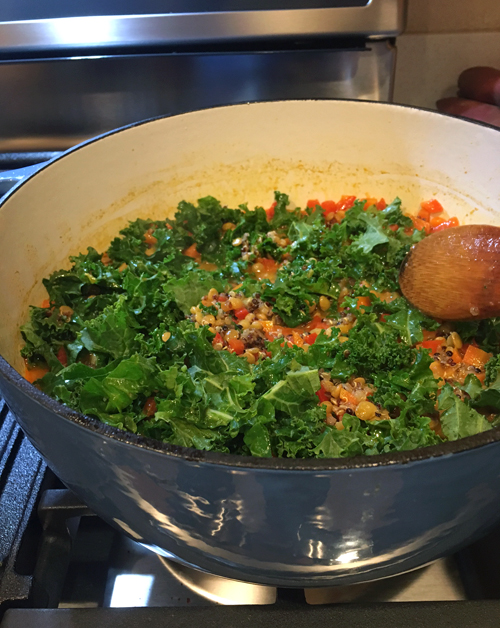
Heat the coconut oil in a large heavy bottomed pot set over medium heat. Once hot, add the red pepper and carrots, cook 2-3 minutes or until lightly charred on the edges. (Ours never charred which worked out fine) Add the garlic + ginger and cook 30 seconds. Add the Thai red curry paste and curry powder, continue cooking for another minute or until the curry is fragrant. Slowly pour in the coconut milk, coconut water and soy sauce. Stir to combine and then bring the mixture to a boil. Once boiling, stir in the lentils and quinoa. Reduce the heat to a simmer, cover and cook for 20-25 minutes or until the lentils are tender and the quinoa is soft. Stir in the kale and continue cooking, uncovered for another 5 minutes. Remove from the heat and stir in the lemon juice + zest, the cilantro and basil. We added a few more pinches of salt after tasting.
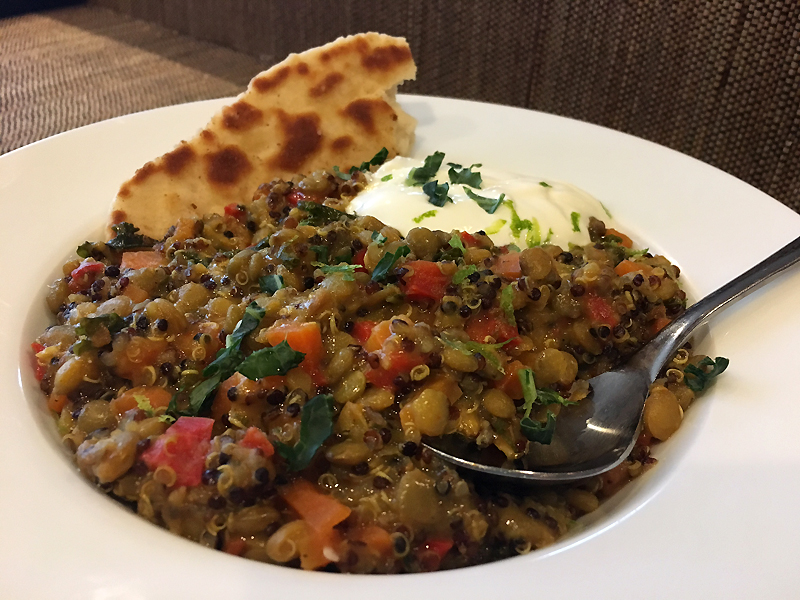
Spoon the curry into bowls and top with mango. Drizzle the mango with lime juice + zest. Garnish the curry with a dollop of greek yogurt and serve with fresh naan. This is where you could add the Fresno chilis and almonds.

I am happy to report that Dan used his naan to literally scrape the bowl clean. Our version was much less rustic due to dicing the carrots and peppers uniformly and not using fresh basil. It was also visibly thicker than the original recipe – looking at our finished dish compared to the photos on Half Baked Harvest. I really think the less soup-like texture is what sold Dan. It should be noted that I have developed a slight allergy to Mango, so I didn’t add any to mine – the others liked the addition.
I took all of the leftovers home and ate it for lunch for 4 days straight. So instead of getting 4 total servings as the original recipe suggested, we got 8 and didn’t change the ingredient quantities. Guessing our portions were smaller. Yay, more room for naan. The curry flavor got better and better as the days went on. It really was the perfect make ahead meal to portion out for lunches.
Homemade Naan
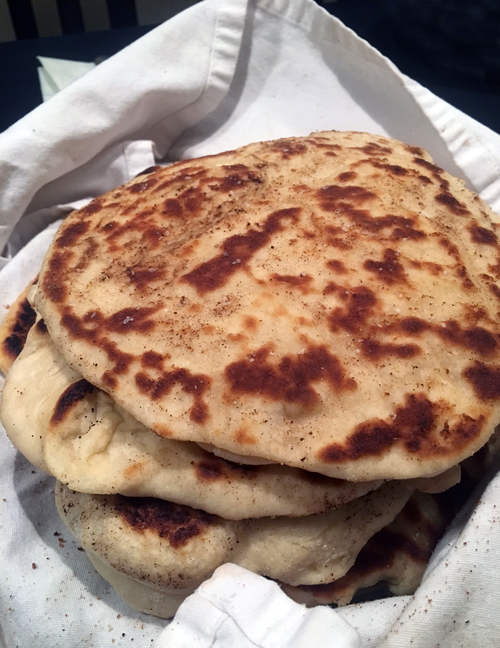
We also followed Half Baked Harvest’s recipe for naan. Making naan was a first for both of us and OMG, it was fairly easy and it tasted so freakin’ good. The leftovers were even good. I used a cast iron skillet to re-heat them.
Nann Ingredients:
- 4 cups all-purpose flour or 1/2 all-purpose and 1/2 whole wheat pastry flour – we used all-purpose
- 1/4 teaspoon salt
- 1 1/2 teaspoons baking powder
- 1 teaspoon baking soda
- 1 tablespoon sugar
- 1/4 cup hot tap water
- 3/4 teaspoons active dry yeast
- 3/4 cup warm milk
- 1 cup greek yogurt
- Melted butter for brushing may use olive oil – we used butter
- Fresh cilantro or other herbs for topping – we only used sea salt
Instructions:
-
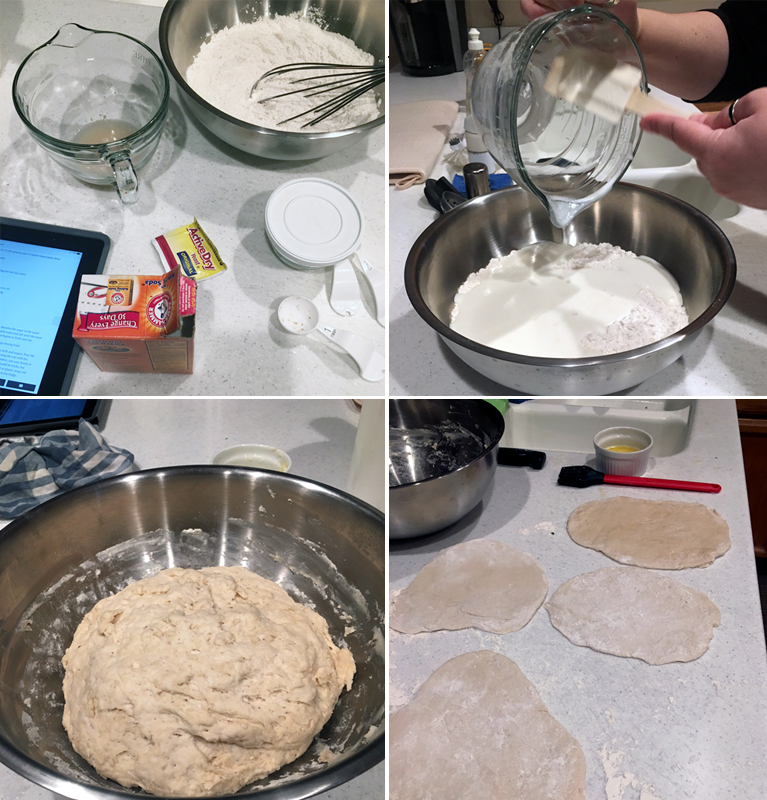
In a medium size bowl, or 4 cup glass measuring cup, dissolve the sugar in the warm water (about 105°F). Add the dry yeast to the warm water and stir until the yeast is dissolved. Let it sit for 10 minutes or until the mixture begins to froth and rise.
-
Add the flour, salt, baking soda and baking powder to a large mixing bowl.
-
When the yeast is foamy and smells like bread, add the warm milk and yogurt. Pour the wet ingredients right into the middle of the dry and begin mixing the wet with dry using a wooden spatula or spoon. When the dough is about to come together, use your hands to finish mixing. As soon as it comes together, stop kneading. It should be sticky, but should form a ball and be soft. Cover the bowl with a damp towel or plastic wrap and let sit in a warm place for 1 hour.
-
When ready to cook, divide the dough into 8 equal balls and using a rolling pin to roll each piece of dough into an oval shape. It should be about 6-8 inches long and about 1/4-inch thick, but no thinner. Repeat this method with the rest of the dough.
-
Warm a cast iron skillet (we used a regular skillet with success) over medium-high heat (you definitely want it pretty hot, but not too hot or you will scorch the naan). Brush both sides of the naan with melted butter and if desired sprinkle on any spices you like such as cumin and garlic. (We didn’t use any spices, just sea salt) Place the naan on the hot skillet, cover with a lid and bake for 1 minute, until you see bubbles starting to form. Flip and cook for 1-2 minutes on the other side, until large toasted spots appear on the underside. Brush with a bit more butter if desired, then sprinkle with salt. Place the naan on a tea towel-lined plate. Repeat with the rest of the naans and serve. Fresh is best, but will keep in a ziplock bag for a few days or in the freezer.
I definitely had a fear of making dough before my obsession with making the perfect at-home pizza. The only thing to consider is allowing enough time to let the dough rise. As I said above, the homemade naan was a total win. Not necessary for the curry recipe, store bought would be fine, but I encourage you to give it a try – it really was easy. It helped to have another set up hands with the butter basting, lid removal, etc. Now that I’ve done it once, I could probably do it by myself next time, it’s just getting the timing down – every cooktop is different.
Thanks Michelle for an awesome night and fun cooking adventure. I’m excited to try other things as the weather starts to warm up. My Weber grill needs a workout!
![]()


1 comment
My boys won’t eat this but I think it sounds delicious!