Creamed Cauliflower

I went a little crazy when I was buying for my Father’s Day veggie tray. The platter was full and I still had green cauliflower left on the counter. I’ve always been fascinated by the bright Crayola yellow-green coloring. It definitely tastes different than the white cauliflower. I would say it’s more mild. Some people think it has a nutty taste to it, since mine was smothered in cheesy goodness, it was hard to tell.

The green cauliflower is actually white cauliflower that has been bred with the chlorophyll compound from broccoli. Designer for sure. Something I learned online this evening – Do not store cauliflower near apples, bananas or melons… as these fruits contain ethylene gas and are harmful to cauliflower – interesting, a sealed Ziploc it is. I tend to mix veggies and fruit because I buy way more veggies than fruit and I need the extra drawer space in the fridge. I don’t like room temperature apples or melon – gotta keep those chilled.

I spent Monday searching for cauliflower recipes online. I found one on myrecipes.com for Creamed Cauliflower with Herbed Crumb Topping (originally from Cooking Light, December 2004) and adapted it because I wanted a smaller portion and I didn’t want to make breadcrumbs from sourdough bread… I already had panko crumbs.

The Ingredients:

Got a little crazy with the ingredient photos – was trying out a different camera setting – so nice… half the ingredients are missing, hah!

1 Head of Cauliflower
3 oz. Panko Bread Crumbs
3 Chopped Leeks
4 Cloves Smashed Garlic
3/4 Cup All-Purpose Flour
2 Tablespoons Butter
1 3/4 Cup 2% Reduced Fat Milk
1 Teaspoon Salt – Divided
1 Cup Grated Parmigiano-Reggiano Cheese (Expensive, but worth getting a nice chunk)
1/4 Teaspoon Freshly Ground Pepper
2 Tablespoons Finely Chopped Fresh Parsley
2 Teaspoons Chopped Fresh Thyme
Cooking Spray

Preheat oven to 400 degrees.
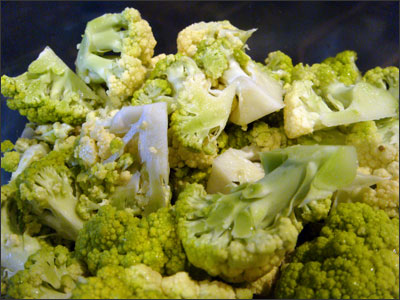
I put the cauliflower in a container and steamed it in the microwave with about 1.5 inches of water for 6 minutes. The recipe said to boil it in water, but I wanted to speed up the process… worked perfectly. While the cauliflower was steaming, I got the leeks washed and cut. I cheated this time and bought pre-washed packages from Trader Joe’s – they still needed a little washing – but it too helped with speeding up the process.

I added the chopped leeks to a sauté pan that had 1 tablespoon butter and 3 garlic cloves already in it. I sautéed them for about 6-7 minutes until tender.

The next step was to combine the flour and the milk. I stirred with the whisk and then added the mixture to the pan with the leeks.

I continued to stir until the sauce thickened – took about 2 minutes on medium heat.

You then stir in 3/4 teaspoon salt, add the cheese and the pepper and then remove it from the heat before adding the steamed cauliflower.
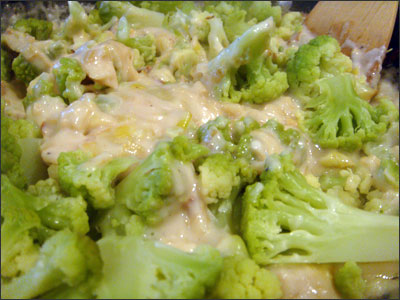
 I stirred in the cauliflower and then spooned the mixture into a baking dish coated with cooking spray. I let that sit for a few minutes while I got the second tablespoon of butter in another pan with the last clove of garlic. I added a few more shakes of salt, fresh parsley and fresh thyme.

I then added the panko breadcrumbs to the butter and herbs and got them coated and slightly browned.
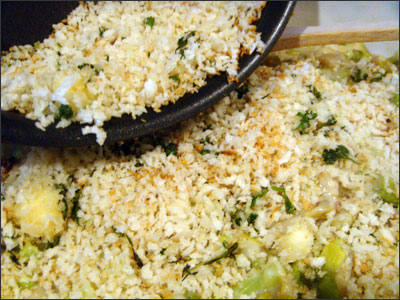
I spooned the bread crumb mixture into the casserole dish, coating the cauliflower evenly. I placed the casserole into the 400 degree oven and cooked until bubbly and browned. It took about 35 minutes.
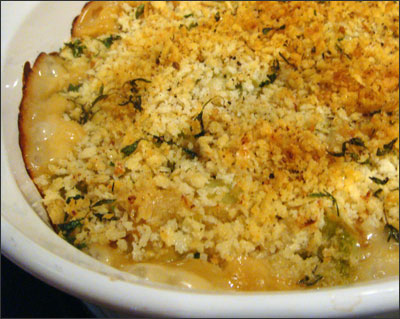
As some of you know, I’m a huge macaroni and cheese fan. I can honestly say that this is an amazing substitute. Sure, it’s not pasta… but wow, I got the same comfort food feeling eating it.

I ate two servings last night – about 2 cups – and I packaged up 3 more generous portions for lunches the remainder of the week. Dan did not give this one a try. He was too busy with his new iPhone that came 2 days early.

I spent the evening eating my casserole and watching Food Network’s The Best Thing I Ever Ate”  – a perfect evening indeed.

Permanent link to this article: http://foodiddy.com/?p=459

Ginger Peach Smoothie

It was hot, I wasn’t super hungry and I had 4 Tivo’d shows to watch last night – Design Star, The Next Food Network Star, Army Wives and Drop Dead Diva.

We did an overnight camping trip Saturday to Sunday and then Sunday night we spent Father’s Day with the family at my bro’s house. No time for TV, no time to grocery shop for the week.

I love thumbing through magazines at the check-out – yes, I’m one of those people. No worries, 99% of the time I end up buying them if I don’t already subscribe. Last time I was at the grocery store,  I picked up the Taste of Home – Summer Appetizers 2010. I bought the 2009 version and I used quite a few of the recipes last Summer.  I love that there are photos on every page.

I had everything but 1 item to make a Ginger Peach Smoothie, so I stopped by the store to grab milk for Dan and the one item I was missing.

Smoothie Ingredients:

2 Cups Frozen Unsweetened Sliced Peaches
1 Cup Plain Yogurt
1/2 Cup Apricot Nectar (The item I didn’t have)
1/4 Cup Ginger Ale, Chilled
2 Tablespoons Honey
1/8 -1/4 Teaspoon Minced Fresh Gingerroot
(Note – the recipe has a ginger tip listed – says when stored in a heavy-duty resealable plastic bag, unpeeled gingerroot can be frozen for up to 1 year) – Hmm… good to know.

Combine all of the ingredients in a blender, process and then pour into a chilled glass.

The smoothie was delicious! I sat outside by the pool looking through magazines while Higgy played in the yard. It was the perfect “First day of Summer” treat!

What’s your favorite smoothie combo?

Permanent link to this article: http://foodiddy.com/?p=445

Caramel Candy Pretzel Rods

My friend Michelle and I turned her kitchen into a candy factory last night. She’s having 50+ people over tomorrow for her daughter’s birthday/graduation party. There will be carnitas, homemade guacamole, beans, rice and platters of Caramel Candy Pretzel Rods for dessert. Michelle found a million different recipes online and she ended up combining a few. She ran around like a mad woman yesterday gathering the pretzels, toppings, trays, storage containers, chocolate, caramel, etc. She was very grateful to find most of the toppings in the bin food section of the grocery store.

Ingredients:
14 oz. of Caramel (We ended up using close to 3 lbs. to do 115 with some mistakes)
1 tbsp. Water for every 14 ozs. of Caramel
Costco size bag of Semi-sweet chocolate chips – used entire bag (a 16 oz. bag would work for one bag of pretzels)
Package of Long Pretzel Rods – FYI – Rold Gold has 10 more rods in a pack compared to Snyder’s (We used 4 bags)
1 Cup Mini M&M’s – We used a huge bin bag
Crushed Toffee Bits – We used 2 packages of Health bar pieces
Chopped up peanuts – 1/2 a produce bag full from the bins
Sprinkles – buy way more than you think you will need – those go fast.

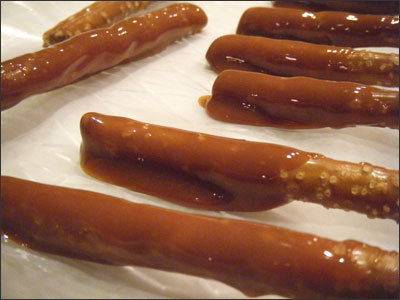
I unwrapped a million pieces of caramel (major sticky fingers) and then we got our toppings arranged into containers. Michelle got the trays set up with wax paper and she had read online about using plastic microwaveable cups (Dollar Tree find) to microwave the caramel so you could just dip the rods right into the cups. This worked out really well. We did 7 oz. at a time and added 1/2 tbsp. of water to each cup before microwaving. Once the pretzels were dipped into the caramel, we gave them a twist in the cup and used the edge of the cup to help cut down on excess caramel. We then placed them on the wax paper to set – about 10 minutes for each set.

Be careful when removing them from the wax paper – if you just pull from one end without twisting, the rods might break.

We then got the chocolate started. We had the brilliant idea of using the cups to melt the semi-sweet chips too. Tip of the day – don’t ever let choc. touch water if you want it to melt. Yikes – we ruined 14 oz. of semi-sweet chips. Michelle saved the day – she got a make shift double boiler up and running. We set the heat to medium low and let the melting begin.

Jen Curran of Fanny and Jane – I have mad respect for your baking skills and patience. Michelle and I “so sucked” at waiting for the chocolate to melt. It was torture, LOL.

We had an assembly line going. Michelle had caramel, I had chocolate and one of Michelle’s daughter’s had the topping station.

The chocolate had to be put on the rods with a rubber spatula – the bowl wasn’t deep enough for dipping and we found that we used way less with that method. After getting them coated, I did the hand-off for the toppings.

Anyone who tries to tell you that this isn’t sticky/messy… they are lying. My fingers were coated in caramel, chocolate and at one point I had sprinkles stuck to my wrist and shirt. Awesome. Once we got in a groove, we cranked them out like an assembly line. 2.5 hours on my feet coating pretzels was a bit much for my back. Towards the end, I sat out and photographed stuff while Michelle and her daughter pressed on. Once the toppings were added to the pretzel rods, we put trays of 20 into the fridge for about 10 minutes each to help them set. This worked well – minus having every condiment on the counter to make room.

They looked like little soldiers lined up on the table. I think they will be a hit at the party.  I now have a new appreciation for the amount of work that goes into these babies. The original recipe estimated about 20 minutes to make an entire package of pretzels. They were obviously professionals… because wow, it probably took me that long to unwrap the caramels, hah!

You could customize them in holiday colors – we had grand plans to make some white chocolate ones or to use melted white chocolate chips to drizzle over the tops. When it hit 10:30 PM – that idea flew out the window. Michelle mentioned adding pink food coloring for a little girl’s birthday party or Valentine’s Day – super cute.

I know from posting a picture on Facebook, that some of you have already made these – any tips to share? What toppings did you use?
 

Permanent link to this article: http://foodiddy.com/?p=435