Carnitas Tacos with Pickled Cabbage Slaw

Summer Taco  and Salsa Party Continued…

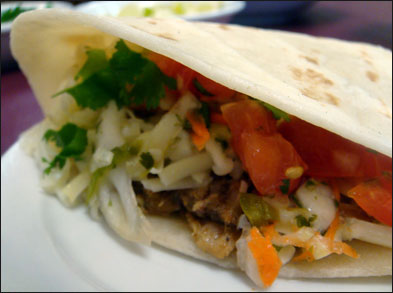
The first taco that Chef Gigi made was her Carnitas Taco with Pickled Cabbage Slaw. I’m definitely a fan of carnitas tacos and this recipe didn’t disappoint.  The only disappointing factor had nothing to do with the recipe – I thought the flour tortillas were too thick – easy enough to fix.
Carnitas Ingredients:
3 Pounds Pork Shoulder
(aka pork butt – even though it’s no where near the butt) – Cut into 2-3 inch cubes/pieces
Taco Seasoning –  Enough to coat the meat – Any kind will do – she used an organic brand – but uses some from Costco at home.
1 Tablespoon of Vegetable Oil – Enough to coat the bottom of a heavy wide pan or large dutch oven.
Water – Pour until it reaches the top of the meat – don’t totally cover the meat.
8 oz. of Coca-Cola – Regular, not diet – the sugar is an important part of the cooking process
3-5 Cloves of Garlic
1 Onion – quartered
1 Lemon – halved
1 Orange – halved
1 Teaspoon Chili Powder
1 Teaspoon Oregano Flakes – dry
2-3 Teaspoons Salt
Pinch of Red Pepper Flakes

(Serves: 4-6)

Cut pork into 2-3 inch cubes and season with the taco seasoning – make sure the meat is coated well. (If you don’t like pre-made taco seasoning – just use your own version).

Heat a heavy wide pan until hot and then add the vegetable oil – enough to coat the bottom of the pan or dutch oven.

When the oil is very hot, add the taco seasoned pork cubes. Fry until browned on all sides. Once browned, add enough water to barely cover the meat and then add the Coca-Cola.

Add the onion and squeeze the orange and lemon, adding the juice and the fruit pieces to the pan.

Season with salt, pepper flakes and oregano (Chef Gigi’s tip was to rub the oregano between your fingers before placing into the pot – works well with your own oils).

Bring pot to a boil and then lower the heat to medium and continue to cook until most of the liquid has evaporated. Remove citrus and continue to cook until tender. (Total cooking time is around 2-3 hours).
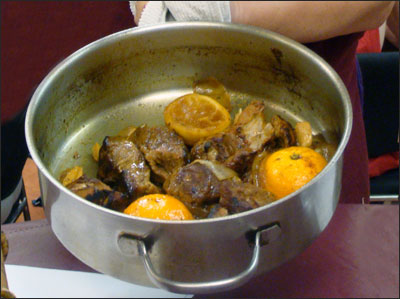
Remove meat when it’s softened and shred with hands or a fork. A student asked if you should turn the pan down to low during the cooking process and the answer was – no, always keep it on medium heat or the liquid won’t evaporate like it should.

Someone else asked how often you should stir the meat – occasionally was her answer – 2-3 times during the whole cooking process.

She recommended serving with pickled slaw, cilantro leaves, jack cheese and a lime wedge on a flour or corn tortilla.

Recipe for Pickled Cabbage Slaw

1/2 head Green Cabbage (Cut into 1/8’s and shred) – yields about 4 cups
3 Green Onions, sliced
1/2 Carrot – shredded
1/4 Cup Red Pepper – small diced
1/4 Cup Cilantro, chopped or to taste (She showed us how to cut cilantro – you roll the bunch and fold the top side under – similar to this MonkeySee video)
1/4 Cup Hot Water with 2 Tablespoons sugar dissolved in it
3/4 Cup White Vinegar
2-4 Tablespoons Picked Jalapeño Liquid (depending on desired heat level)
Chopped Pickled Jalapeños (optional – again… depending on desired heat level)

Mix all ingredients together and place in a ziploc bag overnight. Adjust seasonings after tasting the next day.

Chef Gigi’s staff used burrito sized flour tortillas cut in 1/2 and it was just too much. I like a really light tortilla and will go for that next time I make these.

I’ll be back tomorrow with the second taco and sauce recipes.

Permanent link to this article: http://foodiddy.com/?p=524

learn… taste… enjoy!

Our local natural foods co-op offers classes through their community learning center. I found out about these classes because my friend Kristen (My S.F. Top Chef Tour partner in crime) purchased  a Summer Taco and Salsa Party class for both of us. Birthday presents that keep on giving… gotta love that!

The class was a two-hour instructional class.

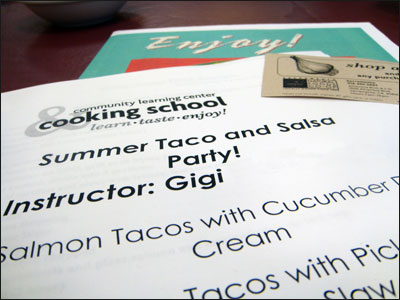
We walked through the door, got checked in and were given our recipe handouts with step by step cooking instructions. We were also given a list of classes through September. I already have my eye on several classes. We weren’t sure what to expect. We picked two seats with decent views and waited for others to join our round table.

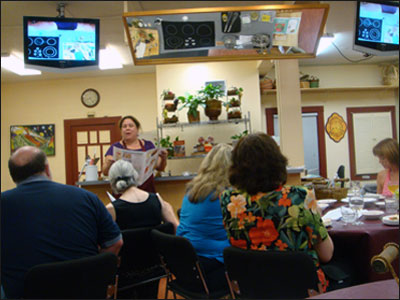
It was 100 plus degrees outside and there were 35 students in the class. They had air conditioning, but the heat from the cooking and bodies pretty much killed that. A ceiling fan would have been a great addition.

The co-op offers hands-on classes, but this one was an instructor lead demo class. The girls that sat at our table were veterans. They all preferred this format over the hands-on format. They said in the hands on classes, you break into sub groups and each group is responsible for one portion of the dish – you don’t learn how to make the entire meal and it’s hard to take notes.

Our instructor was Chef Gigi. She graduated from the California Culinary Academy in San Francisco in 1981.  She’s been in the restaurant industry for over 30 years as a chef and manager. She currently owns a catering business, a food safety business, teaches and writes restaurant reviews and recipes for a local paper and magazine.

I’m going to spend the next couple of posts highlighting each of the taco dishes and sauces that were made. She said that she was all about sharing recipes. All 3 recipes were delicious, but I definitely had a favorite.

Besides the 3 tacos and sauces – she showed us how to make our own salsa and pico de gallo.

First up: Salsa

The below recipe makes about 2 pints.

5-6 Roma Tomatoes – She prefers Roma because the skin is firm and this works well for charred salsa.
1 Medium Onion – Quartered – Her little tidbit – the more torpedo shaped the onion, the stronger the flavor – she likes sweet and rounded because they are more mild.
1 Jalapeno (Small) – She said the same rings true for the jalapeno – the pointier the bottom, the hotter it will be.
3-4 Tomatillos (Medium) – take the paper off, wash and make sure you dry them really well.

Heat stainless steel or cast iron skillet to extreme HOT! – You can’t use a non-stick pan because it won’t be able to handle the heat and you need the heat for a good char. She has a dedicated salsa pan. She wipes the pan out with a cloth, it never hits the water. The pan definitely looked loved.

Add veggies and char until there is a quarter to 1/2 dollar size char on at least 3 sides. She said for one time in your life you want your veggies to BURN.

She then placed the charred veggies into a glass dish and added the following:

1 1/2 Teaspoons Granulated Garlic – Don’t use fresh because you need the garlic to melt into the charred veggies. (Chevy’s secret)
1/2 Teaspoon Ground Black Pepper
2 Teaspoons Salt
Pinch of Oregano and Cumin
Chopped Cilantro

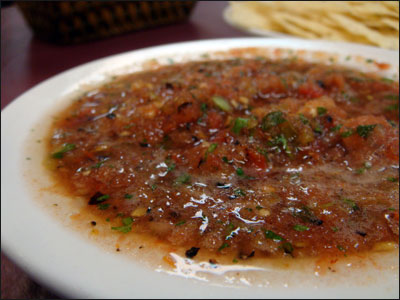
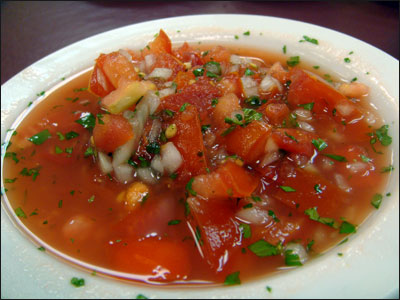
Once all of the seasonings have been added – refrigerate overnight. She said that it’s really important for the veggies to marinate in the spices and be cooled overnight. The next step is to add them to your food processor. You will probably need to do it in a couple of batches. Do not over process, you want it to be a little on the chunky side. (As pictured above)

Second up: Pico de Gallo

The below recipe makes 1 pint.

3 Firm Roma Tomatoes, diced – again she likes the thickness of the Roma skin and she likes that they have less seeds.
1/2 Cup Onion – diced – she prefers a sweet onion.
Jalapeno, diced – amount depends on heat level)  – she used a very small one.
Chopped Cilantro to taste
Juice of 1 Lime
Salt to Taste

Mix together in a small bowl and refrigerate.

Stay tuned for the taco recipes over the next few days. We definitely had a great time in the class – our table was pretty fun. They also were very accommodating of me snapping photos like I’d never seen salsa before, LOL.  I shared my blog via my iPhone and one of the girls copied down the name of my fancy chopper – she’s excited to make zucchini pasta. It was a fun girl’s night out and I’m looking forward to sharing the rest of the recipes with you guys.

Permanent link to this article: http://foodiddy.com/?p=512

Minty Pea and Butter Bean Hummus

Every year a girlfriend orders the Christmas with Southern Living book and we thumb through it at work looking for crafty ideas to work on for the holidays. In the past we have made adorable metal buckets filled with dog biscuits, toys and other treats for our dog lover friends. We made an advent calendar using small gift bags, fabric and scrap-booking supplies for her sister – a sea shell Christmas tree for another friend that loves the beach and we’ve even tried some of the recipes for parties.

The craft projects in the 2010 book were not all that interesting, but a few of the recipes caught my eye. I decided to try one from the appetizer section – Minty Pea and Butter Bean Hummus.

The Ingredients:

2 Cups Frozen Petite Peas – Thawed
2 Cups Frozen Baby Lima Beans – Thawed
3 Tablespoons Extra Virgin Olive Oil
2 Tablespoons Lemon Juice
2 Large Garlic Cloves
1/2 Cup Fresh Mint Leaves (I would use about 1/2 the amount next time)
1/2 Cup Crumbled Feta Cheese (I would use less next time)
1 Teaspoon Salt
1/4 Teaspoon Ground Pepper (I used a lot more than that)
Whole Wheat Pita Bread

I added everything except the pita bread to the blender. I didn’t feel like digging out the big food processor and that thought process turned out to be a horrible idea. My blender is not an awesome Vita-Mix blender and it just didn’t have enough oomph to blend the ingredients. After getting a rubber spatula stuck to one of the blades, I fumbled through the cabinet to find all of the parts to my big Cuisinart and wished at that very moment that I hadn’t given my smaller one to Dan’s friend.

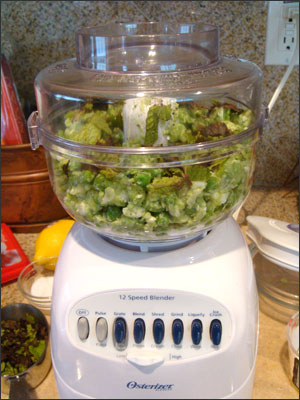
A few weeks back I had found the top to what I thought was the smaller one… couldn’t figure out if it was an extra one that I didn’t give away, it confused me.  I grabbed the box of Cuisinart blades and there was a mini blade inside that fit the smaller unit I had found last week. Huh? I grabbed for the smaller top piece and saw Osterizer etched into the plastic.  No way! My craptastic blender came with an attachment that I never knew it had. Sweet! I was like a kid at Christmas. (Yes that is two Christmas references in the same post and it’s not even July). I gave my new-found treasure a good rinse and loaded my hummus mixture into it and let it whirl!

I got everything mixed up into a creamy texture. There will be some lumps due to the feta.

I then cut the whole wheat pita bread into triangles and used an olive oil and garlic spray on them.  I also added sea salt before putting them under the broiler to crisp up.

They only took a few minutes. I like making my pita chips instead of buying them – Not that I won’t eat an entire bowl of Stacy’s Pita Chips at a party – I just prefer eating hummus with homemade chips or pretzels.

The feta and mint combo was a little overpowering at first – that is why I would dial those two ingredients back a bit for next time. If you don’t like feta, you won’t like this hummus – I bet it would even taste good without it. I happen to like feta, so it didn’t bother me – now if I LOVED feta, I would keep the measurement at 1/2 cup – I just wanted to taste the peas and beans more.

It was a nice change from my normal Trader Joe’s Kalamata Olive Hummus and a perfect afternoon snack. BTW – According to the Internet, we are only 179 days away from Christmas, hah! hah!

Permanent link to this article: http://foodiddy.com/?p=504