Grilled Baby Bok Choy

When I started getting back into cooking over the past year, I made a promise to myself to try new things. I found myself cruising through the produce section of the grocery store – skipping huge sections – stopping only at my favorites.

Fennel? How the heck do you use that?

Brussels Sprouts… oh yah, the things Dad hated…

Leeks? Turnips? Bok Choy? Parsnips?

It was then that I started thinking… I got this! They are vegetables… not scary math problems. Worst case scenario, I don’t like them… at least I can check them off the list.

Last weekend I decided to grab baby bok choy. I have a new obsession with rice noodles, so I thought I could just do a little stir fry to make a homemade noodle bowl. I grabbed a few of them and off I went.

I got home to find the June/July Everyday w/Rachael Ray Magazine in my mail box. As I flipped through the pages, I came to the “50 on a Stick” article filled with pictures of grilled delights. The second page had Prosciutto-Studded Baby Bok Choy and it looked delicious. I had all of the ingredients except the prosciutto… so I put it on the list for the week.

The Ingredients:

4 Baby Bok Choy
2 Cloves of Garlic
3 Tablespoons of Extra Virgin Olive Oil
3 Ounces of Thinly Sliced Prosciutto
Salt and Pepper

The first step was to give the bok choy a good cleaning – similar to the leeks…

It’s really important to get between the leaves and to pat them dry after a good washing…

You then want to cut the bok choy lengthwise – double-check to make sure they are clean between the leaves.
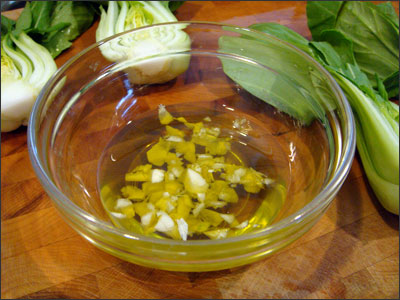
In a bowl, season 3 tablespoons of extra virgin olive oil with 2 crushed garlic cloves. Next time I will probably use less oil.

Cut the 3 ounces of thinly sliced prosciutto into ribbons and stuff between the leaves of the bok choy.

This was actually pretty easy…I ended up using kitchen scissors to get a better cut on the prosciutto, it was sticking to my knife too much.

The next step of the recipe called for you to skewer the bok choy. I decided to use a grill pan on the stove instead of the outdoor grill. I skipped the skewer step and went to the next. I brushed both sides of the baby bok choy with the garlic oil and then seasoned them with salt and ground pepper.

It was at this point that the batteries in my camera died… I got the camera battery into the charger (oily fingers and all) and waited 10 minutes – perfect to start the clean-up process.

I also got the grill pan heated on the stove – I set it on high.

With Dan’s help – I put the bok choy onto the grill (prosciutto stuffed face down) – they sparked and sizzled like the 4th of July… it was a little crazy, but it smelled awesome!

They took about 6 minutes – the recipe suggested 8.  The pan was pretty smokin’ hot. The idea is to grill them on one side for the majority of the time and then flip once at the end to get the back side.

You want them to be crispy, yet tender.

They were delicious! The perfect vegetable side to any dish… I actually ate them as my main course. Dan tried them and thought they were a little too oily. Next time I might try an olive oil spray instead of using a brush. I actually already have some garlic infused olive oil spray. Since I didn’t cook all of the bok choy, I’ll use that for next time.

I could not stop taking photos…they were so pretty and vibrant in color.

Happy grilling… bok… bok…

Permanent link to this article: http://foodiddy.com/?p=151

Watermelon salad with a side of memory lane…

Watermelon 101 – Did you know that watermelon rinds are edible and sometimes used as a vegetable? In China they are stir-fried…they remove the skin and cook it in olive oil, garlic, chili peppers, scallions, sugar and rum… they also pickle the rind. Interesting!

My grandmother Nonnie was the queen of Thanksgiving olive and pickle dishes. She always included pickled watermelon rind. I have to say, I was not a big fan. I was more a fan of my cousin Kim putting olives on all of her fingers during our fancy dinners and the mandarin oranges the kids had in lieu of shrimp cocktail. What was I thinking? Sugared mini mandarins instead of yummy shrimp and cocktail sauce? My how my palate has changed.

Some of my best Thanksgiving memories were helping Mom and Dad fill the shrimp chillers with crushed ice from the ice crusher machine. Hey…it was the 70’s – we didn’t have built-in ice crushing capabilities in our avocado colored fridge.

Enough wandering down memory lane. Let’s get back to watermelon…

I’ve had grilled watermelon and it actually tasted pretty good. The hostess coated it in olive oil and cracked pepper and threw it on the grill. She then served it with a raspberry vinaigrette and crumbled blue cheese.

I also had the pleasure of trying an awesome watermelon salad that my brother and his family brought to my Dad’s birthday party a few years back. At first I was a little hesitant, but after having sampled the grilled watermelon, I was up for trying something new. It turned out to be the hit of the party. I’m pretty sure all of the guests have served it at least once since the party. I know I have.

The Ingredients:

Watermelon
Extra Virgin Olive Oil
Balsamic Vinegar
Feta Cheese
Fresh Mint
Onion
Salt and Pepper

I ended up using a super small portion from a wedge of the watermelon I had left over from the Mother’s Day Fruit Salad.

I used my pampered chef 1 Tablespoon cookie scoop – birthday hint #2 – I could use a melon baller. The tablespoon was way too big, but I wanted things to look pretty. I wanted balls, dammit!

In a small bowl, I combined a few drops of olive oil – about a tablespoon of balsamic and a handful of thinly sliced white onion, salt and pepper. I julienned some mint leaves and then added those to the mix. I whisked things around and then placed my whopper melon balls into the bowl for a good coating. I then got out my girlie dessert dishes and started creating my masterpiece of a salad. I topped the melon and onion combo with crumbled feta cheese. I then drizzled more balsamic from the bowl and added mint for garnish. Yes, I did all of this for myself. Me, myself and I. This is definitely not a dish for Dan.

I looked online to see if I could find a similar recipe, so you could have the exact measurements for a party sized portion.  I found a Paula Deen recipe for Watermelon Salad with Mint Leaves – it was close. The only difference being that she used red wine vinegar instead of balsamic – I liked the added sweetness of the balsamic.

So there you have it. A perfect summer salad – if you haven’t tried the combo, I think you should!

Permanent link to this article: http://foodiddy.com/?p=146

Broccoli-Cheddar Soup

Broccoli…ranks right up there with spelling the word vacuum…and why I normally refer to it as “broc.” – it’s just easier.

Don’t even get me started on gray vs. grey…

I woke up this morning to dreary weather. It was gray/grey and overcast with a drizzle. Rain and high winds were slated for the afternoon. I knew the hub was riding his motorcycle to work, so I was worried about that …enter the never-ending headache’s return and I knew it was going to be a sucky Monday. No worries, I pressed on. I got to work just before the rain started really coming down.

It was definitely soup weather. This was confirmed when I got caught in the middle of the storm without an umbrella. By the time I got from building A to my car, I was soaked. It was at that moment that I decided to make soup for dinner.

On my way home from work, I stopped at the grocery store to pick up the bread for the bowls and some of the ingredients that I didn’t have on hand. I had come across a “Copy That!” recipe in the January/February Food Network Magazine for Panera’s Broccoli-Cheddar Soup. It just happens to be one of Hilly’s favorites, so I thought I’d try mastering it. She’s under the weather with a cold, so she couldn’t try it in person…but there was enough for the freezer for a later date.

The Ingredients:

Disclaimer: This is definitely not a low-fat soup…see all of those cubes of butter? Full fat half-and-half…yep! I was not going for healthy this evening. I was going for comfort. I can think of several ways to cut down on the goodness calories. Fat free half-and-half, reduced fat cheese, etc. Not sure there really is an etc., but there has got to be other ways.

6 Tablespoons Unsalted Butter
1 Small Onion
1/4 Cup All-Purpose Flour
2 Cups Half-and-Half
3 Cups Low-Sodium Chicken Broth
2 Bay Leaves
1/4 Teaspoon Freshly Grated Nutmeg (note: could use a grinder – birthday hint…)
Kosher Salt and Freshly Ground Pepper
7 inch Round Bread Bowls – the only fresh out of the oven ones were the Dutch Crunch – it was fine, but sourdough would be better
4 Cups Broccoli Florets (worked out to be one head)
1 Large Carrot, Diced
2 1/2 Cups (about 8 ounces) Grated Sharp White and Yellow Cheddar Cheese

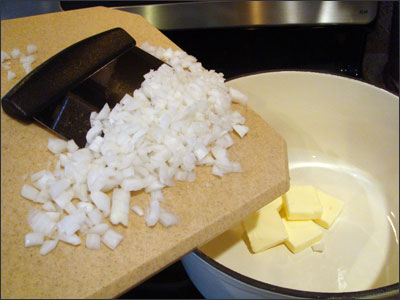
I added the onion once the butter started melting over medium heat…cook onions until tender – about 5 minutes.

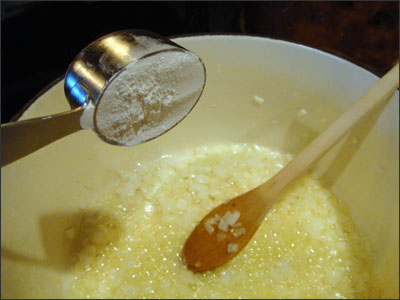
Adding the flour and juggling the camera one-handed proved to be a little difficult.

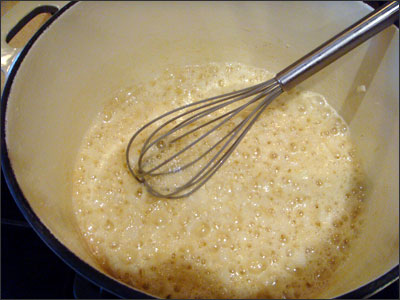
Whisk in the flour and cook until golden brown (took about 3 minutes)

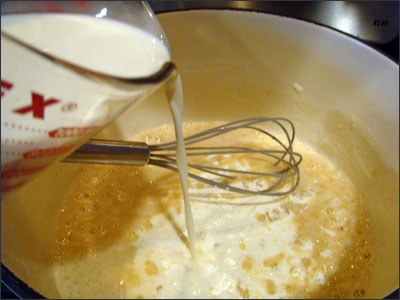
Gradually whisk in the half-and-half until smooth – not exactly sure how you get it super smooth with the onions…but close enough.

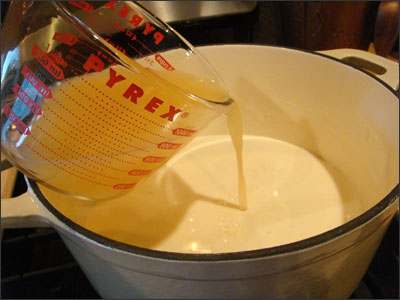
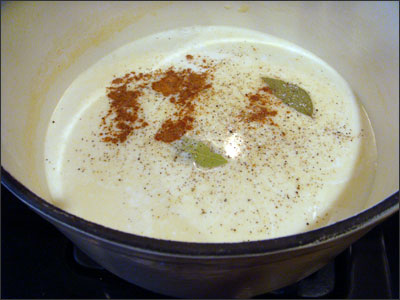
Action shot…hold your excitement…I added the chicken broth, bay leaves and nutmeg…

Then I seasoned with salt and ground pepper. I brought things to a simmer, reduced the heat to medium-low and then cooked uncovered until thickened – 20 minutes.

I diced up the carrot, shredded the cheese and got the broccoli florets ready for the pot.

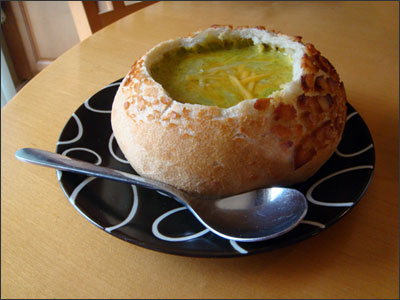
I then got the bread bowls prepped and ready for filling…

I added the broccoli and diced carrots to the broth mixture and simmered until tender – it took just over 20 minutes.

I broke out my craptastic work horse of a blender…tried a smoothie blender and it sucked, this one has done just fine. I used a ladle to transfer the soup into the blender and then let it rip…(note: I just used the blend button – make sure you remove the bay leaves before the puree process) – I had to blend in two batches. Option 2 – if you have one, you can use an immersion blender right in the pot.

I then whisked the cheese into the green slop 😉 over medium heat. The recipe gives the option to add 3/4 cup water at this point, I didn’t need to do that, the consistency was perfect.

Soup is served! Yes, it really is that green.

I thought it really did taste like the Panera soup. The only difference being that I don’t think Panera purees it to the level that the “copy cat” recipe called for. Dan was not a fan of the texture. He prefers the Broccoli-Cheddar soup from Boudin Bakery at Disney’s California Adventure Park. I will now be on the search for that recipe.

I got 4 servings out of the batch and put 2 in the freezer for future lunches. Next time I think I’ll just drive to Panera to shell out $6.00 and some change.

All in all…I’m glad I tried it.  

Permanent link to this article: http://foodiddy.com/?p=126