Roasted Cauliflower and Broccoli

Last time I was at Trader Joe’s, I picked up a tray of multi-colored cauliflower and broccoli. I’m definitely drawn to color in clothing, art and food. There was a time in my life where I pretty much wore black every single day.  I also died my hair black and wore black Doc Martens to bed – hah! I painted my childhood bedroom with super dark – outdoor forest green house paint  – Mom and Dad loved that one. Took my Dad a million coats of primer to paint before they moved. A switch turned and by the time I hit my 30’s, vibrant colors entered my life. That is if you don’t count the period in my 20’s where I had fuchsia hair. 😉

Enough of that, let’s get cookin’.

The Ingredients:

12 oz. Package of Cauliflower and Broccoli Pieces – (about 2 cups) – Next time I’ll just buy a head of cauliflower and a head of broccoli
1/2 Tablespoon Extra Virgin Olive Oil – It was a generous 1/2 tablespoon – probably more like 1 Tablespoon.
1 Teaspoon Dried Marjoram – Trying to find this led to a spice cabinet clean out and organization
1/4 Teaspoon Salt
Freshly Ground Pepper to Taste
1 Tablespoon Balsamic Vinegar
1/4 Cup Finely Shredded Parmesan Cheese

First step – preheat the oven to 450 degrees. Toss the cauliflower/broccoli, EVOO, marjoram, salt and pepper in a bowl.

Spread the seasoned mix onto a baking sheet and roast in the oven for 15-20 minutes.

I pulled my batch at 18 minutes. They were starting to soften and brown on the bottom like they were supposed to. I removed them from the baking sheet and put them back into the bowl and added the balsamic.
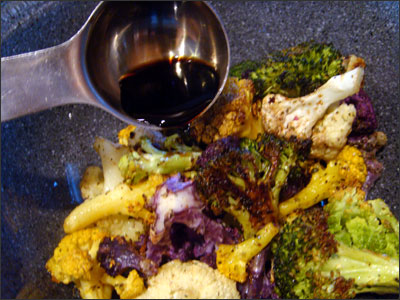
Make sure you coat the cauliflower and broccoli really well. 

Sprinkle the mixture with the finely shredded parmesan and then get things transferred back onto the baking sheet.  Roast until the cheese is melted, the moisture has evaporated and the edges start browning. It took my batch another 10 minutes.

I was on my own for dinner last night, so this easy dish was perfect! I put a piece of garlic bread under the broiler and dinner was served on the patio.

This weekend will be filled with a lot of cooking and a family BBQ at our place. I have a feeling tonight will be major house cleaning and everything that goes along with having a house full of people.

Happy Friday!

Permanent link to this article: http://foodiddy.com/?p=226

Brussels Sprouts – Don't be a hater…

Brussels Sprout, Brussels Sprouts, Brussel Sprouts – whatever floats your boat. I’m going with “Brussels Sprouts” because it seems most popular.

If you have never tried brussels sprouts and think you might want to,  I’d go with “roasted” as your first introduction. For years I feared brussels sprouts. I never touched them because my Dad put the hate on them from childhood on. I’ve talked to several people who also dislike brussels sprouts and it seems that all of them have only had frozen or steamed versions. I can understand how that might be the issue. My guess is over-cooking and texture is part of the problem.

My first attempt at cooking brussels sprouts was to roast them. I picked up a tray of fresh/pre-cut at Trader Joe’s.  I did a quick Internet search on the iPad and came up with a cooking time of 400 degrees for 40 minutes. No problem – I coated them in extra virgin olive oil, added salt and put them on a cookie sheet in the oven to roast.

I only turned them once during the 40 minute cook time. The outer leaves turned a beautiful amber/brown color and were crispy, while the insides were soft with a slight crunch. I highly recommend this method.

Since then, I’ve purchased whole brussels sprouts at the farmer’s market and done the same thing.  I have yet to get one of the prehistoric looking brussels stalks – but now I think I’d be comfortable doing so – maybe when they are back in season.

I’ve roasted sprouts 4-5 times and was on the search for another recipe. I looked online and found a recipe for tofu, apples and brussels sprouts. I tweaked it a lot – got rid of the tofu option, added bacon, LOL – and caramelized shallots. So I’m calling it Shredded Brussels Sprouts Stir Fry

Ingredients:

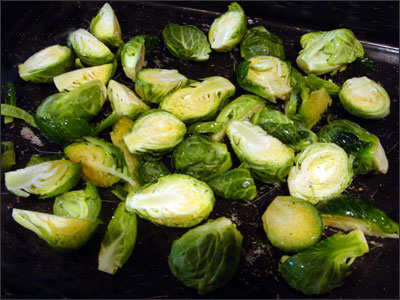
10-12 Brussels Sprouts – Cut into ribbons
4 Shallots – Thinly sliced
2 Garlic Cloves – Smashed
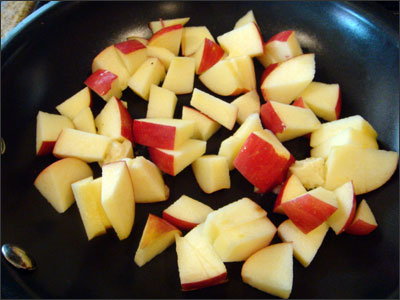
1 Fuji Apple – Cut into bite sized chunks
4 Slices Applewood Smoked Bacon – Cut into small pieces
1 Tablespoon Maple Syrup
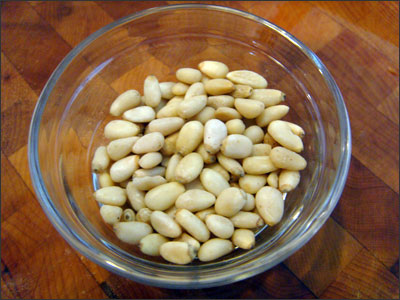
1/4 cup Toasted Pine nuts – Pictured below
Salt and Ground Pepper to Taste
A Few Splashes of Extra Virgin Olive Oil – not pictured – used in the pan with the shredded sprouts

I prepped stuff while my bacon and apples started in two different pans…

I swear there actually was some precision with the bacon cutting – hah!

This might seem weird, but I added the garlic and maple syrup in with the apples – I actually grabbed one during the cooking process and it was delicious.  The apples only took about 5 minutes. I set them aside and focused on the bacon. Once the bacon was done, I set it aside. I then drained off the majority of the fat from the pan. I left a tiny bit in the pan and added the shallots – the house smelled amazing.

While those were cooking, I used a single splash of EVOO in another pan and added the chopped brussels sprouts. I contemplated more bacon fat, but could feel my arteries clogging.

I left the brussels sprouts in the pan without stirring for a good 5 minutes. This allowed them to caramalize a bit on one side. You want them to turn golden to amber in color on the ribbon edges. As they were cooking – the shallots were also finishing up. I then removed the shallots and threw the pine nuts into the shallot pan for a few minutes. I should point out that pine nuts are CRAZY expensive. I got them out of one of the bins at the fancy market and they were $37.00/lb. Wow,  I had no idea that pine nuts were that expensive. I’ve since seen them online for close to $50/lb. and as low at $16/lb. I bought $3.00 worth because I’m a baller like that.

Had to take a photo of my über expensive pine nuts

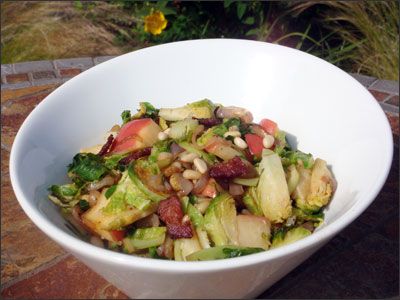
Everything finished cooking around the same time. I added the onions and nuts to the brussels sprouts, then I added the apples and bacon. I tossed everything, added some ground pepper – a pinch of salt and transferred everything into its party dress serving bowl for the photo shoot.

This bowl is actually fairly small – the entire batch made about 3 servings.

I can’t even describe how much I loved this dish! I loved it so much, I didn’t even mind my wreck of a kitchen. It’s not a normal thing for me to use 3 pans, 5 bowls, etc. for one dish.

If you haven’t ventured into “Brussels Sprouts” land – I recommend giving it a go.

Permanent link to this article: http://foodiddy.com/?p=210

Wheat Berry Salad

I knew I wanted to make something fresh and light for dinner last night. After having had a rather sinful sushi lunch – I went with the tempura/multiple sauce roll, I didn’t want to go to bed feeling stuffed.

I had seen an ad for Pompeian oils and vinegars in a magazine a few months back. The ad also contained a recipe for Black Bean, Edamame and Wheat Berry Salad. I had tracked down some of the ingredients over the weekend and decided that would be the recipe I’d try.

The Ingredients:

4 Cups Water – not shown – used to cook the wheat berries
1/2 Cup Dry Wheat Berries
1/2 of a 15 oz. Can of Black Beans – rinsed and drained
1 Cup Shelled Edamame – the recipe called for thawed frozen – I went with fresh from Trader Joe’s
1 Cup Chopped Tomato
1/2 Cup Finely Chopped Red Onion
3 Tablespoons Extra Virgin Olive Oil
2 Tablespoons Red Wine Vinegar
Salt and Ground Pepper to taste – not shown…I’m sure you are all familiar with my salt and pepper shakers now 😉

Serves 6 –  (3/4 Cup Servings)

Wheat berries – I had heard of wheat berries. I had seen other recipes that called for wheat berries, but I wasn’t exactly sure what they were or where to find them in the grocery store.  I thought for sure they would be near the rice – to me they looked similar to brown rice when cooked. Well… A wheat berry refers to the entire wheat kernel, except for the hull. They can be cooked several different ways. You can cook them similar to rice – add water, bring to boil and then simmer. You can soak them and then sauté them in olive oil with garlic and other spices. You can also add them to bread for a crunchy texture or ground them up into a wheat flour. They are available in both soft and hard textures and they vary in color from white (light tan) to red (reddish-brown). I’m pretty sure the original recipe showed red, but all I could find at the store was soft/white. You can find them in the grain section or healthy foods section of the grocery store, near the flour.

For you calorie counters – A cup of wheat berries has about 300 calories and is packed with fiber, protein and iron.

The first step was to rinse the dry berries. A fine mesh strainer would have worked great for this… the coffee filter/pampered chef can strainer/hoopty combo I used… was pretty much a pain in the butt.

Mental note: Must purchase a fine mesh strainer.

Anyway, I added the rinsed berries to 4 cups of salted water. The cooking instructions on the wheat berry package called for way less water, but the recipe instructions I used – called for 4 cups  – bring to boil, simmer for 50 minutes and then drain.

While the wheat berries where simmering, I chopped up the tomatoes and red onion. I rinsed and drained the black beans and added all of the ingredients, minus the wheat berries to a bowl. I gave it a good mix and then put it into the fridge to marinate.

As soon as the berries were finished, I grabbed my coffee filter, can strainer, make-shift contraption and I rinsed the berries with cold water to cool them down. I patted them dry with paper towels and then got them added in with the other ingredients. I gave everything a good stir and did a taste test. It needed something. I added more ground pepper and a splash or two of balsamic. I let the salad mixture sit in the fridge for another 30 minutes.

Perfection! I will definitely be making this dish again. I loved the combination! It would be great paired with grilled chicken.

I ended up eating it with a 100 calorie everything bagel thin w/reduced fat cream cheese. I actually ended up using my bagel as a scoop – it was delicious!

I’m super excited about wheat berries and can’t wait to try them in more recipes – good thing I still have the majority of the huge bag left. One of the recipes I came across combined wheat berries with milk, honey and cinnamon – interesting, I could see that – they do have a rather nutty taste to them.

Queen of all things salad and master of the side-dish,

Permanent link to this article: http://foodiddy.com/?p=203